Two of the people I made Christmas presents for were K's sister R and my cousin M. They are 20 and 18, respectively, and are both good with words and artsy stuff, yet in different ways. So I decided to make them both journals for Christmas. Because they're so different, I didn't want to make them the same item at all. And because it was homemade, I wanted it to be a really cool journal that you couldn't buy in stores.
I found lots of great ideas and instructions for making journals here, here, here, here, and here, and although they were all lovely, I wanted mine to be different.
I went to my local craft store and went to the scrap-booking aisle. I perused this aisle probably twice for at least thirty minutes at a time before I made my decisions. I bought packets of additional scrapbook pages -- the kind in plastic sheets that attach to the cover with pegs -- and I bought stacks of printed cardstock pages. I fell in love with the Amy Butler paper, of course, and I found cool rock'n'roll patterns, too. I also stocked up on glue and chip board for the covers themselves.
Basically, I followed the instructions for the technical stuff when making these, except I made them bigger. I made R one that was eight inches by eight inches -- I found scrapbook pages that were already this size, and just made a spine that was wider than called for in most of the tutorials. I made M's eight and a half inches by five and a half inches -- I just folded a bunches of regular sheets of paper in half. Both times I made signatures and sewed them together, but I also glued them to the spines, as was recommended in one of the tutorials. I had to cut R's paper to a special size, but it wasn't that big of a deal. As for making the holes in the paper and signatures, though -- use a hammer and nail if you don't have any of the fancy bookmaking equipment called for. I tried to use a thumbtack and ended up cutting up and bruising my hands. I used the chipboard for the covers, and covered them in fabric. Before I glued it on, I sewed pieces of paper to the fabric to decorate it -- I cut out shapes of their first initials and other pieces. I used pink-patterened Amy Butler paper for R and swirly rock'n'roll inspired paper for M.
Here's R's cover, after I sewed the paper on and before I glued it to the chipboard: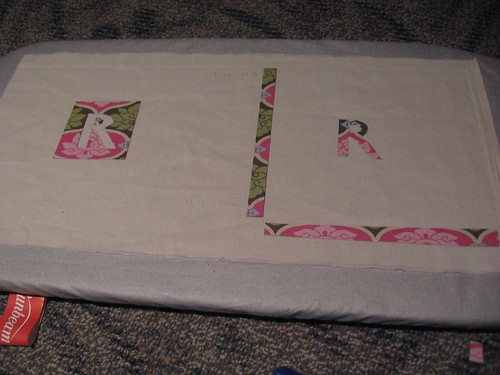
I thought the best part of my journals was that I used those scrapbook pages so that they could have pockets to store notes, pictures, or whatever else they wanted to. I switched out the blank white inserts with colored paper from the cardstock stacks, cut to fit. I had sewn in the pockets along with the signatures and paper, so they're just as snug as any other sheet. They also act as dividers, if they want them to be, because they're easy to flip to.
They both loved them. My only regret with R's was that I ended liking the back cover better than the front. She did, too, but she's left-handed, and it turns out she prefers to write from the back to the front, anyway. So the back is sort of the front now on hers. :-)
Unfortunately, despite swearing that I took pictures of this process and the finished products, I can't find any more pictures of these journals. I'm going to ask their recipients to send me pictures of them. I'll post those when I get them. And despite being time consuming and frustrating at times, it was really fun and a good challenge -- they looked really cool at the end. I really love journals anyway, and lucky for me, both R and M do, too.
Saturday, January 26, 2008
Homemade journals
Subscribe to:
Post Comments (Atom)


2 comments:
Very creative. Nicely done! With creativity, I feel I do alright with painting and drawing, knitting and crocheting...but not sewing. Awesome job. :)
I think I do better with sewing than painting and drawing (but I love the idea of painting rooms). But I overlap with you on crochet (and maybe someday knit, when I get confident with it). Almost opposite!
Post a Comment